
iMy 2.2 for iOS 7
Securely access your MySQL databases
iMy was the first MySQL client for the iPhone. Now, it's the first one to let you securely access your databases via SSH.
iMy is a full MySQL client for the iPhone. It features the ability to generate complex queries without ever using the keyboard.
Features:
- SSH Tunneling with 3rd party relaying
- Construct complex queries using the built in keyword list and table and field views
- Save queries for future use
- Download query results directly from your device
- Upload large queries from your desktop computer to your device to avoid typing
- Advanced filtering of query results
- Email query results directly from iMy
- Get server statistics and terminate processes
- Uses Keychain to store passwords securely
- Native compiled MySQL client library for maximum performance
Download the iMy 2.1 User's Manual here.
Walkthrough
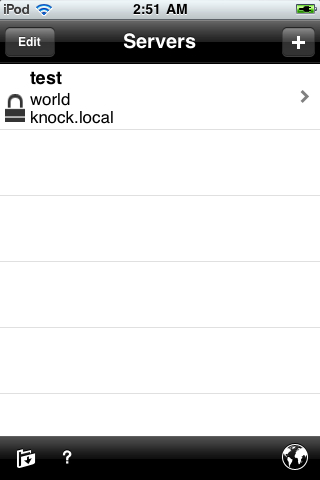
Managing Connections
The Connections screen. The connection description is on the first line, with the database name on the second line, and the address/host of the MySQL server on the bottom line. If the connection is an SSH connection, a padlock appears to the left of the connection information.
Working with the interface
Connected to the database. Here is the main query screen. Drag your finger across the letters on the toolbar and an indicator will show up letting you know which letter you are on, and when you release your finger the keyword bar will show all MySQL keywords for that letter. To get to special symbols, select the '*' on the far right, and to get to server functions, such as loading and saving queries, tap the connection information on the top of the screen.
From here you can load queries from your desktop machine directly into the device, save your current query for reuse, check server status, get a list of tables and fields to insert into your queries, or insert a carriage return into your query.
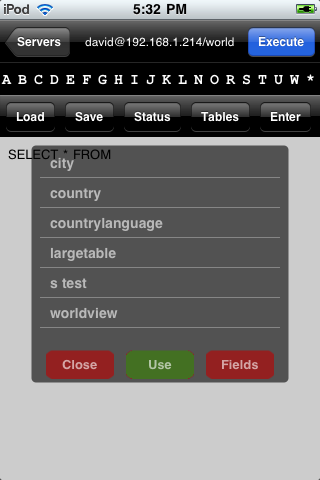
Inserting Tables or Fields
Tapping on the connection information in the top middle of the screen will show you the options toolbar. On this toolbar is the Tables button. Tapping it will reveal a two sided view of all of the tables and fields in the database. Select a table on the front side, and then tap the fields button, and all of the fields for that table will appear. Tap the use button to insert either the selected field or table into the current query. The view is semitransparent, so your query is still visible underneath.
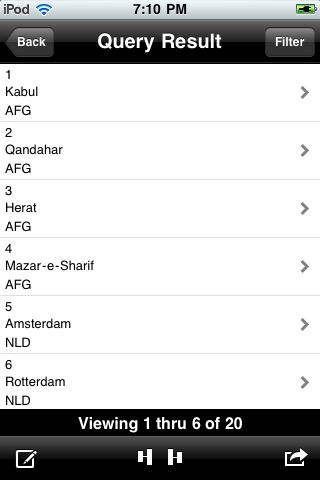
Executing Queries
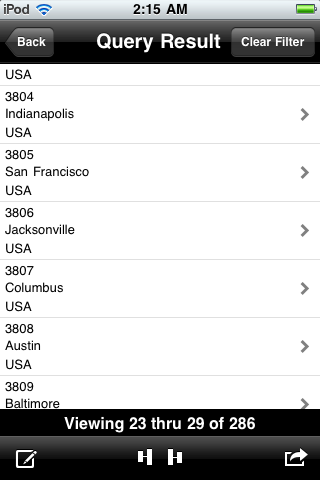
Viewing an executed query. Navigating recordsets is done by 'halving'. Halving is achieved by using the two center buttons on the bottom toolbar. Each button will move you halfway through the recordset in either direction. This makes it very easy to navigate to a specific place in a large recordset with only a few taps. For example, if your recordset returns 5200 records, and you wanted to get to record 1300, tapping the right half button would take you to record 2600 (one halfway between 1 and 5200). Tapping the left half button then takes you one halfway between 2600 and 1, so record 1300 would be the next active record.
From here you can also use the action button to retrieve the next 20 records, retrieve all records, or save your query results to a file, which can then be downloaded directly to a desktop computer.
The button on the left will allow you to email the results of the query in an attachment.
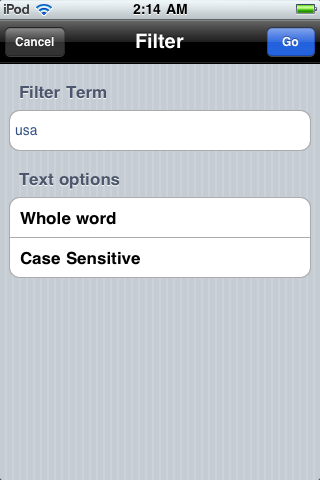
Filtering Records
Records can be filtered on any field, with options to set whole world and case sensitivity. All records that match the filter criteria will remain in the detail view. The Filter button will then toggle to be able to clear the filter, returning your recordset to its original state.
Viewing Records
Viewing a record in detail
Selecting a row in abbreviated mode will present the full record in vertical form. If for some reason, the field is longer than can be read on one line, a disclosure indicator will appear, showing the full value of the field.
Server Status
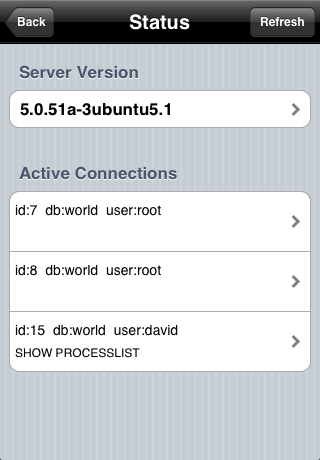
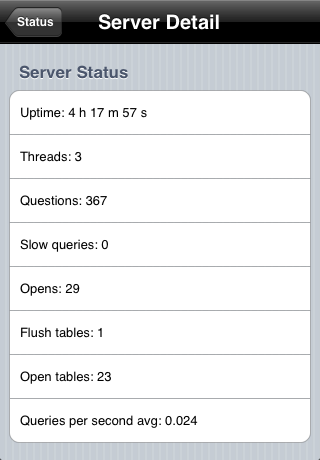
This view presents the Server type and all connected processes to the server. Selecting the server at the top will show more detailed server statistics, such as uptime, etc.
By selecting a process, it is possible to view the full activity, and with proper permissions, kill that process.
Support
See here for iMy support.